• 모든 순환함수는 반복문(iteration)으로 변경 가능하다.
  • 그 역도 성립함. 즉 모든 반복문은 recursion으로 표현 가능하다.
  • 순환함수는 복잡한 알고리즘을 단순하고 알기쉽게 표현하는 것을 가능하게 한다.
  • 하지만 함수 호출에 따른 오버헤드가 있다.(매개변수 전달, 액티베이션 프레임 생성 등)
  • 적어도 하나의 base case, 즉 순환되지 않고 종료되는 case가 있어야 한다.
  • 모든 case는 결국 base case로 수렴해야 한다.


연습


미로찾기

미로


입구는 (0,0)이고 출구는 (n-1, n-1)일때 입구에서 출구까지 도착하는 경우의 수를 찾아보자


현재 위치에서 출구까지 가는 경로가 있으려면

  1. 현재 위치가 출구이거나 혹은
  2. 이웃한 셀들 중 하나에서 현재 위치를 지나지 않고 출구까지 가는 경우가 있거나

둘 중 하나이다.


우선 답이 yes 인지 no 인지 경로가 있는지 없는지 생각해보자

boolean findPath(x, y) { // 현재 좌표의 x,y 를 파라미터로 넘긴다.
	if (x, y) is the exit { // 현재 위치가 출구라면 true를 리턴한다.
    	return true;
    } else {
    	for each neighbouring cell(x', y') of (x, y) do { // (x', y') 이웃한 이웃셀 최대 4개
        	if (x', y') is on the pathway { // 벽이 아니라면
            	if findPath(x', y') {
                	return true;
                }
            }
        }
        return false;	
    }
}


간략하게 생각해보면 위와 같이 생각해볼 수 있다. 위에 코드가 무한루프에 빠지는지 반드시 확인해봐야 한다. 

이건 무한루프에 빠질 수 있다. (x',y') 입장에서 (x, y)는 다시 인접한 셀이된다. 그래서 무한하게 양쪽 셀을 반복하는 경우가 발생할 수 있다.


그렇기 때문에 내가 방문했던 적이 있는 셀인지 아닌지 확인하는 코드가 더 들어가야 한다.


boolean findPath(x, y) { // 현재 좌표의 x,y 를 파라미터로 넘긴다.
	if (x, y) is the exit { // 현재 위치가 출구라면 true를 리턴한다.
    	return true;
    } else {
    	mark (x, y) as a visited cell; // 방문했다고 표시한다.
    	for each neighbouring cell(x', y') of (x, y) do { // (x', y') 이웃한 이웃셀 최대 4개
        	if (x', y') is on the pathway and not visited { // 벽이 아니고 방문한 적이 없는 경우
            	if findPath(x', y') {
                	return true;
                }
            }
        }
        return false;	
    }
}


자바코드로 풀이해보자

입력값


public static boolean findMazePath(int x, int y) {
	if (x < 0 || y < 0 || x >= N || y >= N) { // x,y가 범위를 벗어나는 경우
    	return false;
    } else if (maze[x][y] != PATHWAY_COLOUR) { // 길이 아닌 경우
    	return false;
    } else if (x == N-1 && y == N-1) { // 도착지점에 도착한 경우
    	maze[x][y] = PATH_COLOUR;
        return true;
    } else { 
    	maze[x][y] = PATH_COLOUR; // 방문한 곳으로 변경한다.
        if (findMazePath(x-1, y) || findMazePath(x, y+1) 
        	|| findMazePath(x+1, y) || findMazePath(x, y-1)) {
            	return true;
            }
            maze[x][y] = BLOCKED_COLOUR; 
            return false;
    }
}

'자료구조&알고리즘' 카테고리의 다른 글

시간복잡도  (0) 2023.09.19
Array에서 Index는 왜 0부터 시작할까?  (2) 2023.09.15
List 와 Set  (1) 2023.09.12
Array List 와 Linked List  (1) 2023.09.08
Array 와 List 의 차이  (1) 2023.09.08

CSS의 속성값을 기정할 때도 함수 개념을 적용할 수 있다. CSS의 함수는 괄화 안에 인수를 전달하면, 인수에 따른 결과값을 속성에 적용하는 방식으로 작동한다.


CSS 함수의 대표선수 calc()

CSS 함수의 calc()를 이용하면 계산식의 결과를 속성값으로 지정할 수 있다. calc() 함수는 괄호 안에 표현식 하나를 받고, 표현식의 결과가 최종 값이 된다. 표현식은 단순 계산이면 무엇이든 가능하다.


예를 들어,  width: calc(30px - 20px) 이런 식이다.


<!DOCTYPE html>
<html lang="en">
<head>
    <meta charset="UTF-8">
    <meta http-equiv="X-UA-Compatible" content="IE=edge">
    <meta name="viewport" content="width=device-width, initial-scale=1.0">
    <title>calc 함수</title>
    <style>
        .message{
            display: flex;
            justify-content: space-around; /*좌우로 여백을 두고 펼처진다*/
            align-items: center;
            height: 100px;
            padding: 0.5em;
            border: 1px solid #000;
            font-size: 1.5em;
        }
        .message_text{
            width: 80%;
            height: 100%;
            border: none;
            resize: none;
        }
        .message_text:focus{outline:none;}
        .message_send{
            width: 20%;
            height: 100%;
            border-radius: 8px;
            background-color: #9ec4cf;
        }

    </style>
</head>
<body>
    <div class="mass">
        <textarea class="message_text" name="" id="" cols="30" rows="10"></textarea>
        <button class="message_send">전송</button>
    </div>
</body>
</html>


위 코드를 브라우저에서 확인해보면 브라우저의 크기가 커질수록 전송 버튼의 크기가 늘어나게 된다.


전송 버튼의 크기를 고정해보자.

<!DOCTYPE html>
<html lang="en">
<head>
    <meta charset="UTF-8">
    <meta http-equiv="X-UA-Compatible" content="IE=edge">
    <meta name="viewport" content="width=device-width, initial-scale=1.0">
    <title>calc 함수</title>
    <style>
        .message{
            display: flex;
            justify-content: space-around; /*좌우로 여백을 두고 펼처진다*/
            align-items: center;
            height: 100px;
            padding: 0.5em;
            border: 1px solid #000;
            font-size: 1.5em;
        }
        .message_text{
            width: 80%;
            height: 100%;
            border: none;
            resize: none;
        }
        .message_text:focus{outline:none;}
        .message_send{
            width: 100px;
            height: 100%;
            border-radius: 8px;
            background-color: #9ec4cf;
        }

    </style>
</head>
<body>
    <div class="mass">
        <textarea class="message_text" name="" id="" cols="30" rows="10"></textarea>
        <button class="message_send">전송</button>
    </div>
</body>
</html>


전송 버튼의 크기를 100px로 고정했다. 이렇게 했을 경우 브라우저의 크기가 커졌을때 message_text 의 크기 80%와 전송 버튼의 100px을 뺀 나머지 부분이 빈 영역으로 존재하게 된다.


예상하지 않던 여백이 생긴 것이다. 이럴때 calc() 함수를 사용할 수 있다.


<!DOCTYPE html>
<html lang="en">
<head>
    <meta charset="UTF-8">
    <meta http-equiv="X-UA-Compatible" content="IE=edge">
    <meta name="viewport" content="width=device-width, initial-scale=1.0">
    <title>calc 함수</title>
    <style>
        .message{
            display: flex;
            justify-content: space-around; /*좌우로 여백을 두고 펼처진다*/
            align-items: center;
            height: 100px;
            padding: 0.5em;
            border: 1px solid #000;
            font-size: 1.5em;
        }
        .message_text{
            width: calc(100% - 100px); /*전송 버튼을 뺀 나머지 부분을 모두 차지한다*/
            height: 100%;
            border: none;
            resize: none;
        }
        .message_text:focus{outline:none;}
        .message_send{
            width: 100%;
            height: 100%;
            border-radius: 8px;
            background-color: #9ec4cf;
        }

    </style>
</head>
<body>
    <div class="mass">
        <textarea class="message_text" name="" id="" cols="30" rows="10"></textarea>
        <button class="message_send">전송</button>
    </div>
</body>
</html>


message_text 의 크기를 변경했다.


위에서 봤던 것과는 다르게 브라우저의 크기를 늘려도 불필요한 여백이 생기지 않았다.


정리

em을 이용해 상대적인 크기의 폰트를 적용할 때처럼, 레이아웃에도 비율에 기반한 개념을 적용할 수 있다. 

부모 요소의 크기에 비례해 자식 요소의 크기가 변하는 방식은 가변 레이아웃을 만들 때 흔히 사용되는 방식이다.


그럴 때 사용되는 상대적이고 비례적인 단위는 바로 % (퍼센트) 이다.


% 단위는 백분율 값을 나타낸다. 보통 부모 요소와의 상대적 크기를 지정할때 사용한다. 너비와 높이, 여백 뿐 아니라 글자 크기에도 사용할 수 있다.

/* 부모 요소의 글자 크기가 100% */
font-size: 50%;

/* 부모 요소의 높이가 100% */
height: 50%;

/* 부모 요소의 너비가 100% */
width: 50%;
margin: 50%;
padding: 10%;


아래의 코드로 연습을 해보자

<!DOCTYPE html>
<html lang="en">
<head>
    <meta charset="UTF-8">
    <meta http-equiv="X-UA-Compatible" content="IE=edge">
    <meta name="viewport" content="width=device-width, initial-scale=1.0">
    <title>가변 레이아웃</title>
    <style>
        .container {
            width: 960px;
            margin: 0 auto;
            text-align: center;
        }
        .header{
            width: 960px;
            height: 100px;
            background-color: tomato;
        }
        .main{
            float: left;
            width: 640px;
            height: 300px;
            background-color: orange;
        }
        .asdie{
            float: right;
            width: 320px;
            height: 300px;
            background-color: purple;
        }
        .footer{
            clear: both; /*float으로 인해 문맥이 흐트러지는 것을 방지*/
            width: 960px;
            height: 100px;
            background-color: violet;
        }
    </style>
</head>
<body>
    <div class="container">
        <div class="header">HEADER</div>
        <div class="main">MAIN</div>
        <div class="aside">ASIDE</div>
        <div class="footer">FOOTER</div>
    </div>
</body>
</html>

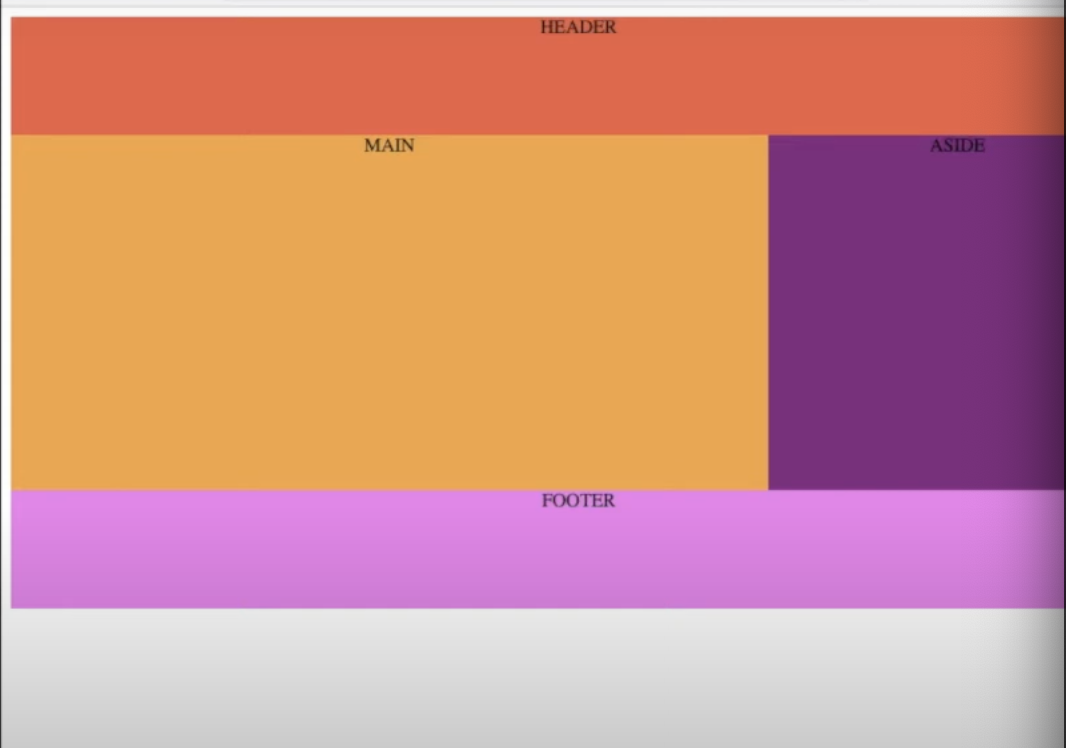
브라우저에 표시


위 레이아웃은 960px; 이라는 고정 크기를 가지고 있다.  그래서 960px; 보다 작은 화면을 만나게 되면 요소가 가려지게 된다.

이때 사용하면 좋은것이 가변레이아웃 % 이다.


<!DOCTYPE html>
<html lang="en">
<head>
    <meta charset="UTF-8">
    <meta http-equiv="X-UA-Compatible" content="IE=edge">
    <meta name="viewport" content="width=device-width, initial-scale=1.0">
    <title>가변 레이아웃</title>
    <style>
        .container {
            width: 90%;
            margin: 0 auto;
            text-align: center;
        }
        .header{
            width: 100%;
            height: 100px;
            background-color: tomato;
        }
        .main{
            float: left;
            width: 640px;
            height: 300px;
            background-color: orange;
        }
        .asdie{
            float: right;
            width: 320px;
            height: 300px;
            background-color: purple;
        }
        .footer{
            clear: both; /*float으로 인해 문맥이 흐트러지는 것을 방지*/
            width: 100%;
            height: 100px;
            background-color: violet;
        }
    </style>
</head>
<body>
    <div class="container">
        <div class="header">HEADER</div>
        <div class="main">MAIN</div>
        <div class="aside">ASIDE</div>
        <div class="footer">FOOTER</div>
    </div>
</body>
</html>


가장 부모 요소인 container 를 90% 로 설정해보자

960px 이었을때 동일하게 960px을 가지고 있던 header, footer 를 100% 로 설정할 수 있다.

main과 aside도 동일하게 % 단위로 변경해보자.


<!DOCTYPE html>
<html lang="en">
<head>
    <meta charset="UTF-8">
    <meta http-equiv="X-UA-Compatible" content="IE=edge">
    <meta name="viewport" content="width=device-width, initial-scale=1.0">
    <title>가변 레이아웃</title>
    <style>
        .container {
            width: 90%;
            margin: 0 auto;
            text-align: center;
        }
        .header{
            width: 100%;
            height: 100px;
            background-color: tomato;
        }
        .main{
            float: left;
            width: 67%;
            height: 300px;
            background-color: orange;
        }
        .asdie{
            float: right;
            width: 33%;
            height: 300px;
            background-color: purple;
        }
        .footer{
            clear: both; /*float으로 인해 문맥이 흐트러지는 것을 방지*/
            width: 100%;
            height: 100px;
            background-color: violet;
        }
    </style>
</head>
<body>
    <div class="container">
        <div class="header">HEADER</div>
        <div class="main">MAIN</div>
        <div class="aside">ASIDE</div>
        <div class="footer">FOOTER</div>
    </div>
</body>
</html>


이렇게 변경하면


브라우저 창이 작아져도 레이아웃을 유지하는 것을 확인할 수 있다.


<!DOCTYPE html>
<html lang="en">
<head>
    <meta charset="UTF-8">
    <meta http-equiv="X-UA-Compatible" content="IE=edge">
    <meta name="viewport" content="width=device-width, initial-scale=1.0">
    <title>가변 레이아웃</title>
    <style>
        *{ box-sizing: border-box;}
        .container {
            width: 90%;
            margin: 0 auto;
            text-align: center;
        }
        .header{
            width: 100%;
            height: 100px;
            background-color: tomato;
        }
        .main{
            float: left;
            width: 67%;
            height: 300px;
            padding: 10%;
            background-color: orange;
        }
        .asdie{
            float: right;
            width: 33%;
            height: 300px;
            padding: 10%;
            background-color: purple;
        }
        .footer{
            clear: both; /*float으로 인해 문맥이 흐트러지는 것을 방지*/
            width: 100%;
            height: 100px;
            background-color: violet;
        }
    </style>
</head>
<body>
    <div class="container">
        <div class="header">HEADER</div>
        <div class="main">MAIN</div>
        <div class="aside">ASIDE</div>
        <div class="footer">FOOTER</div>
    </div>
</body>
</html>


위와 같이 padding: 10%; 로 줘보자


그러면 부모 요소인 container 너비를 기준으로 10% 의 padding 크기를 갖는걸 확인할 수 있다.


정리

'Front-End > 반응형 웹' 카테고리의 다른 글

반응형 웹(6) - 미디어 쿼리  (0) 2024.07.17
반응형 웹(5) - calc()  (0) 2024.07.15
반응형 웹(3) - 다양한 상대 단위  (0) 2024.07.13
반응형 웹(2) em & rem  (0) 2024.07.09
반응형 웹(1)  (0) 2024.07.08

+ Recent posts